
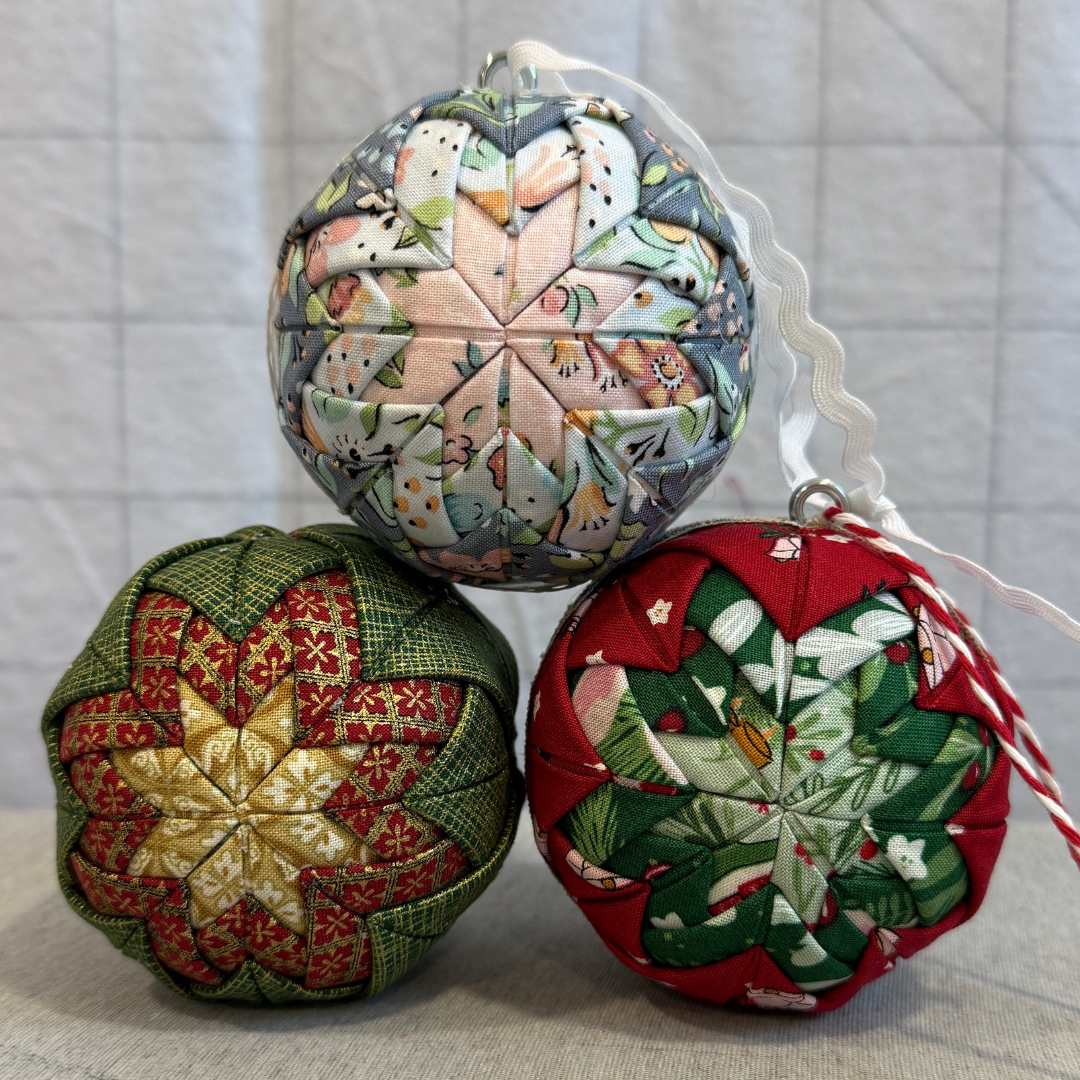
The Perfect Scrap-Busting Christmas Project!
Have you ever looked at your leftover fabric scraps and wondered what you could make with them? I've got the sweetest little holiday project for you!
These No-Sew Fabric Star Ornaments are a fun and easy way to use up your favorite fabric scraps, add a little handmade charm to your Christmas tree, or create a thoughtful handmade gift for someone special. And the best part? You don't need a sewing machine!
I originally shared this project in a video last year, but recently I pulled out my supplies and made another batch with my mom. She wanted to take one to her annual ladies' club ornament exchange and we had so much fun making them together. It was one of those simple afternoons of creating and spending time together that makes handmade projects even more special.
So, I decided this tutorial deserved another moment in the spotlight!
Supplies You'll Need
One of my favorite things about this project is that you only need a few supplies, and it's a great opportunity to dig into your quilting scraps.
3 different quilting cotton fabrics: Solids or small prints work best.
40 fabric squares, cut at 2.5": You'll need 8 for the center, 16 for the middle, and 16 for the outside.
2.8" foam ball: https://link.amazon/B0fAt8zmt
Small screw eyes: https://link.amazon/B0cByhGB9
Hot glue gun: https://link.amazon/B0814KuNa
Dressmaker pins: https://link.amazon/B05rO9pVo
1/2"–3/4" ribbon to match or make your own matching binding
String, an ornament hook, or ribbon: For hanging your finished ornament.
Thimble: Optional, but highly recommended!
A little tip: Choose three fabrics that coordinate but offer a little contrast. Small prints, tone-on-tone fabrics, and solids are all great choices. This is also a wonderful way to use leftover pieces from a quilt you've recently finished!
How to Make a No-Sew Fabric Star Ornament
Let's get crafting! This project is made by layering folded fabric squares onto a foam ball using dressmaker pins. As you add each layer, the folded fabric creates a beautiful star pattern.
Step 1: Prepare Your Fabric
Start by selecting three coordinating fabrics. Cut each fabric into 2.5" squares.
You'll need 40 squares total:
Fabric 1 (Center): 8 squares
Fabric 2 (Middle): 16 squares
Fabric 3 (Outside): 16 squares
Set your fabric squares into three separate piles so they're ready to go!
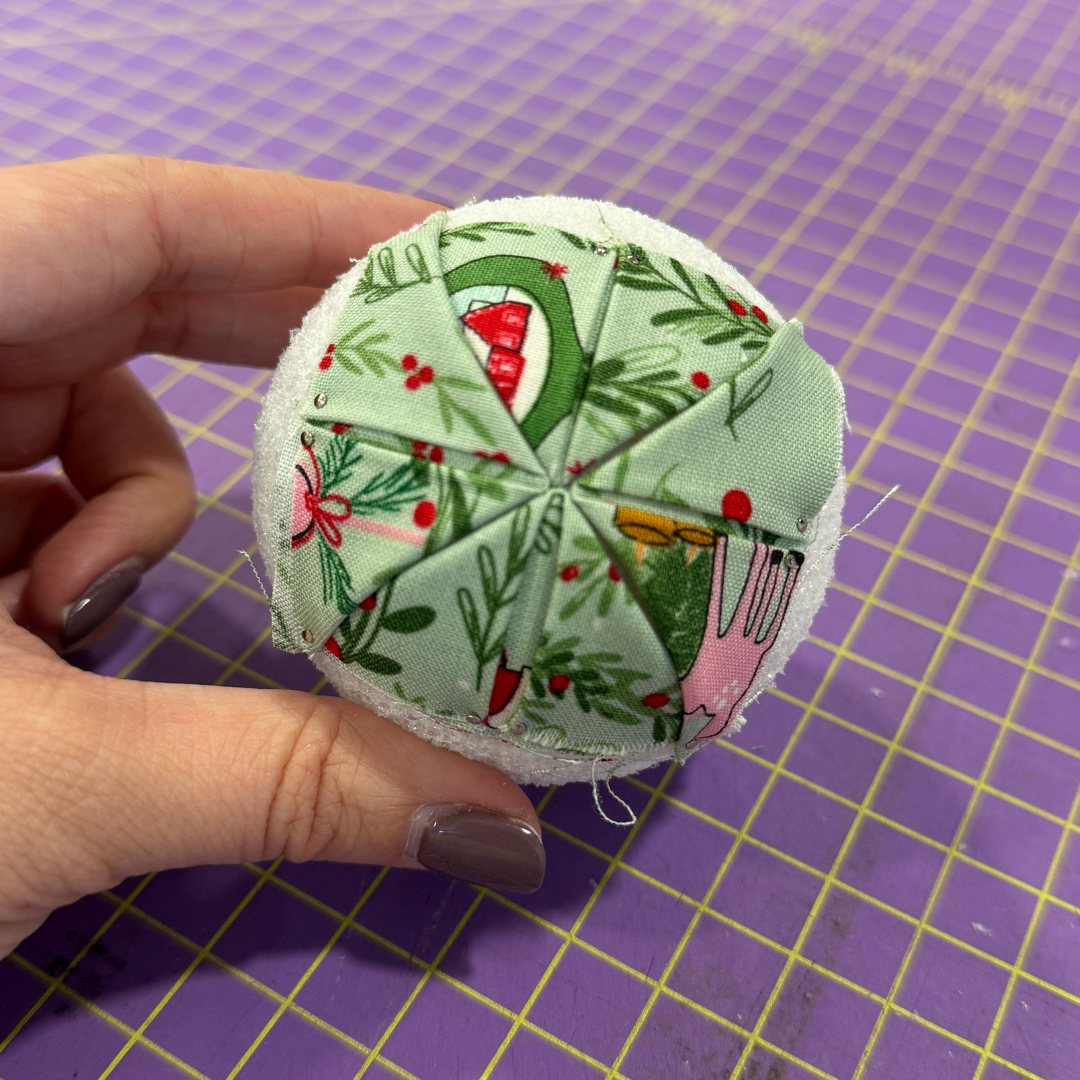
Step 2: Create the Center of Your Star
Start with your first fabric and the 2.8" foam ball.
Take one 2.5" fabric square and position it on the foam ball.
Fold the fabric to create a triangle, bringing the edges together neatly. Use dressmaker pins to secure the folded fabric to the ball.
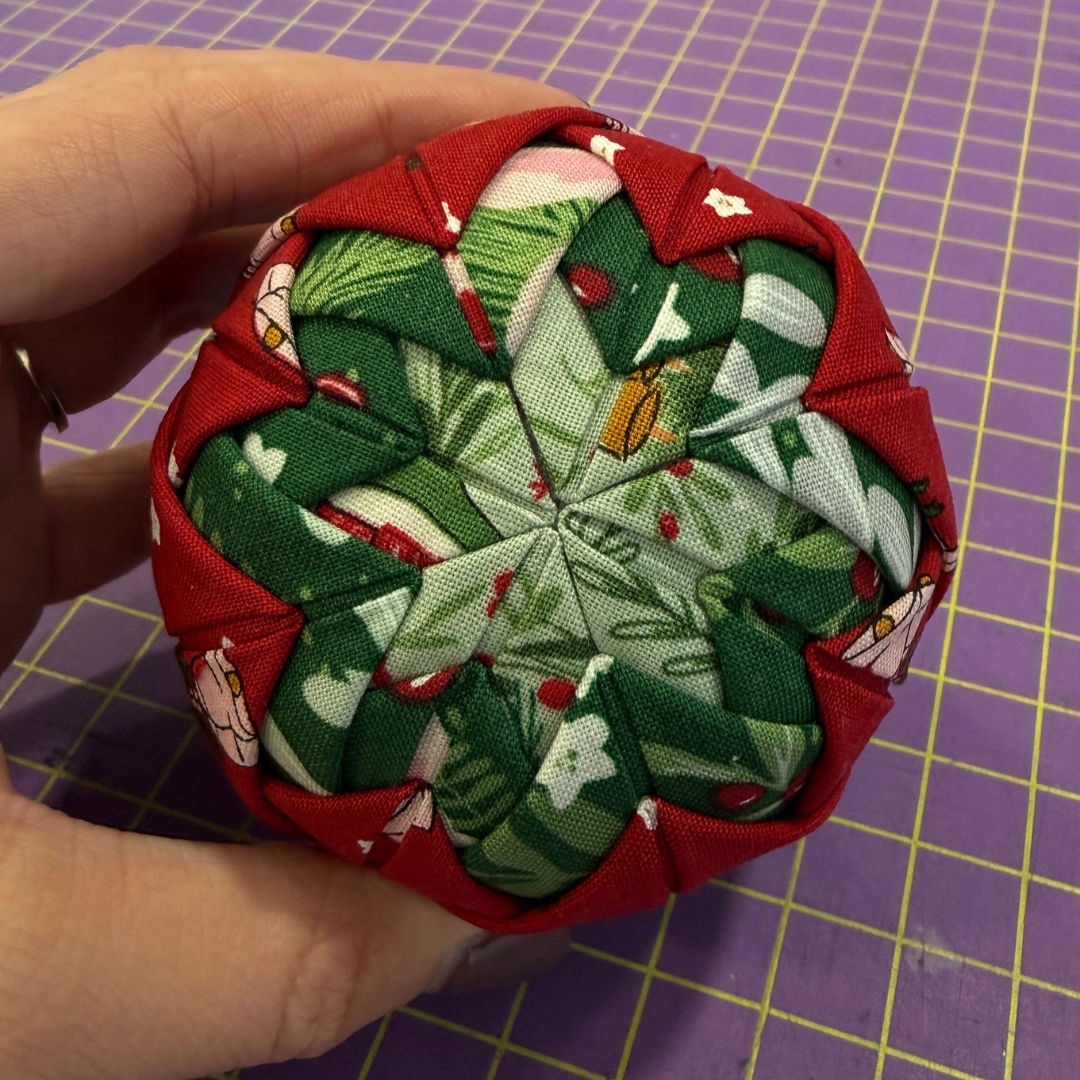
Continue adding your folded fabric pieces, working your way around the center point. You'll use all 8 squares from your first fabric to create the center star.
Take your time with this first section. Getting those points lined up neatly will help create a beautiful star in the middle of your ornament.
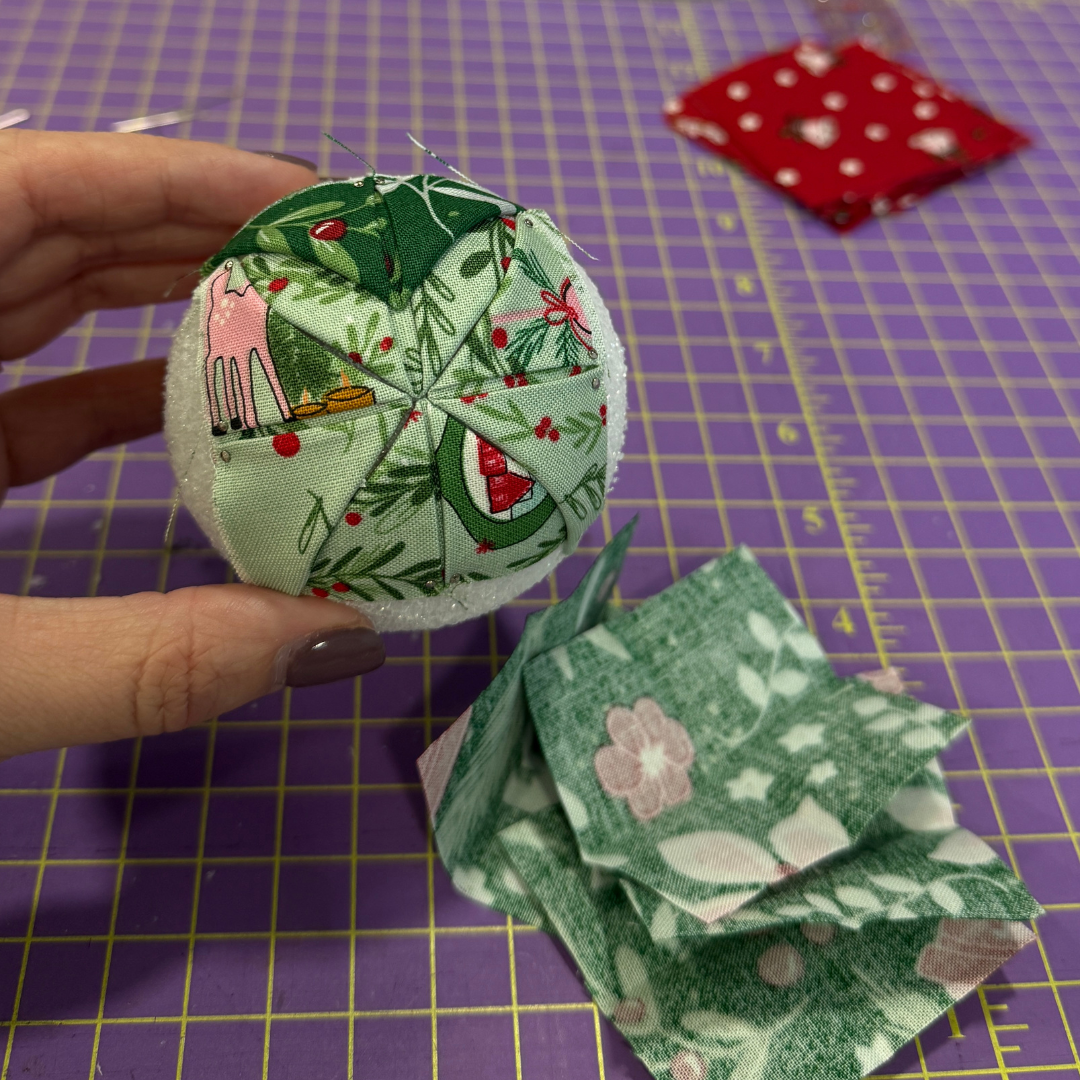
Step 3: Add the Middle Layer
Now it's time to introduce your second fabric!
Using the same folding technique, begin placing your folded fabric squares around the first layer. Position each new piece so that it overlaps the raw edges of the previous layer and creates that pretty layered star effect.
Continue working around the ball until you've added all 16 squares from your second fabric.
You'll start to see the star pattern really take shape!
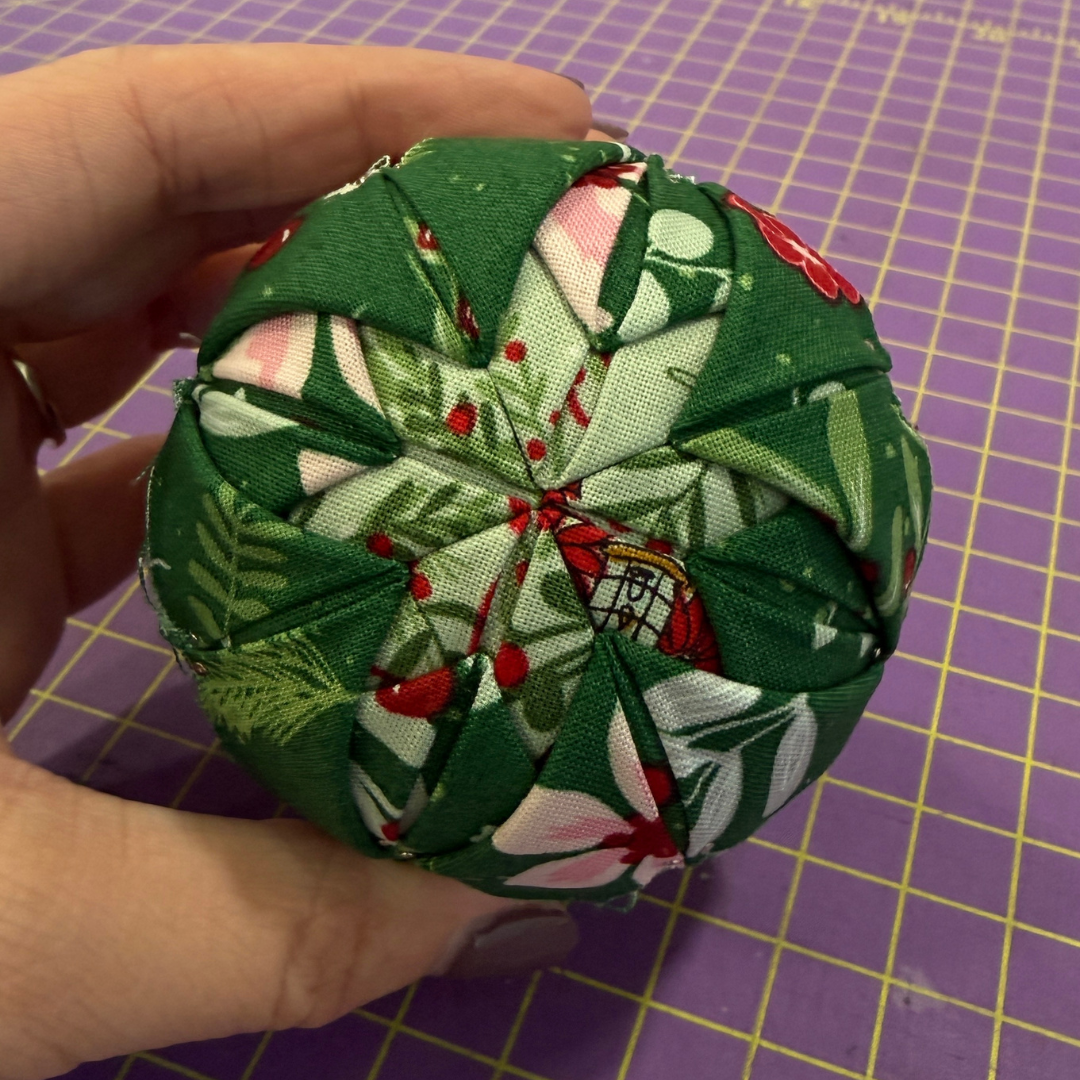
Step 4: Finish the Outside Layer
Grab your third fabric and repeat the process with your remaining 16 squares.
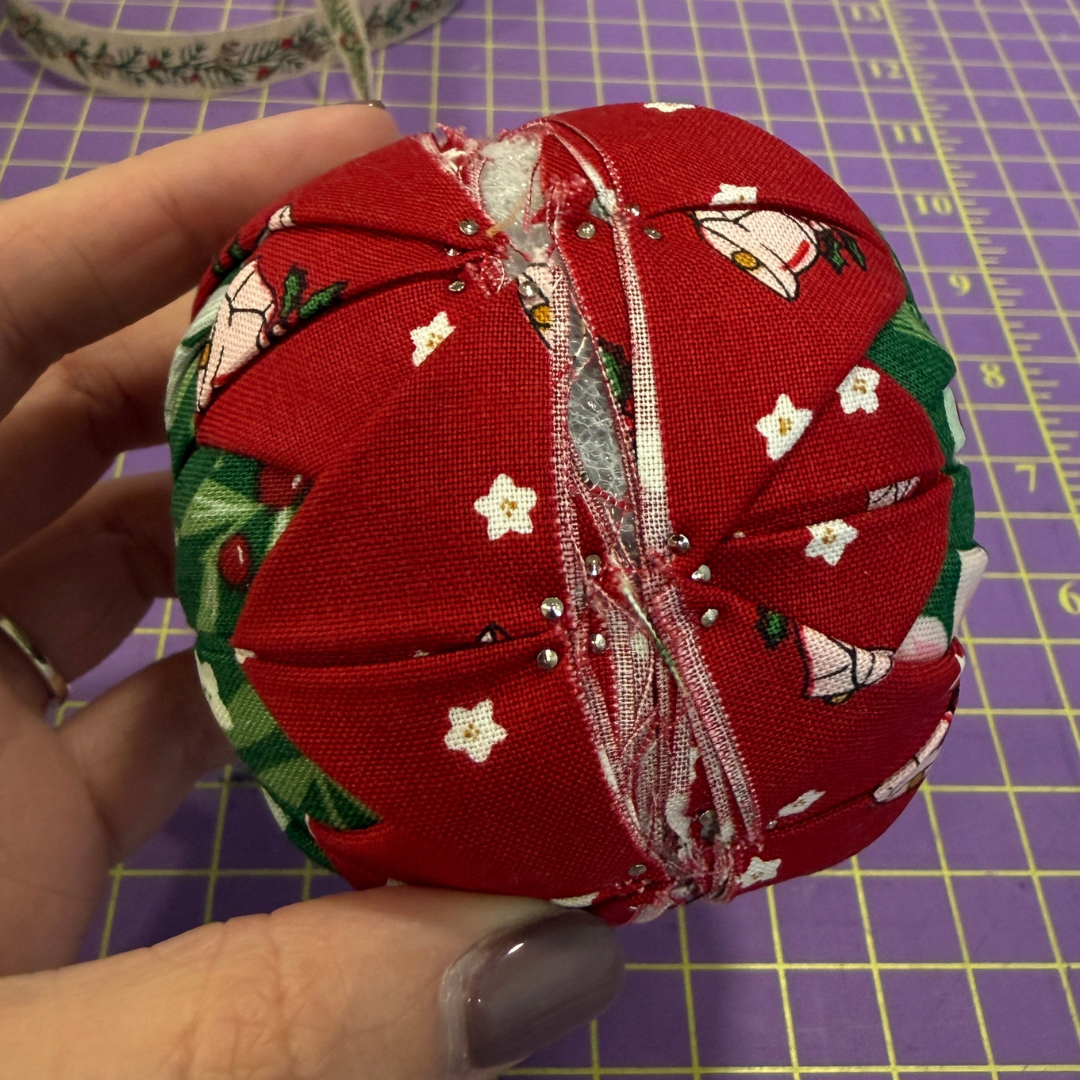
Continue overlapping and pinning your folded fabric pieces until the foam ball is completely covered.
As you work, rotate the ball and check that your fabric points are lining up nicely. Don't be afraid to adjust a piece or reposition a pin to keep everything looking neat.
Once you've covered the entire ball, you'll have a beautiful fabric-covered ornament with a starburst pattern on both ends!
Step 5: Add the Finishing Details
Now for the fun finishing touches!
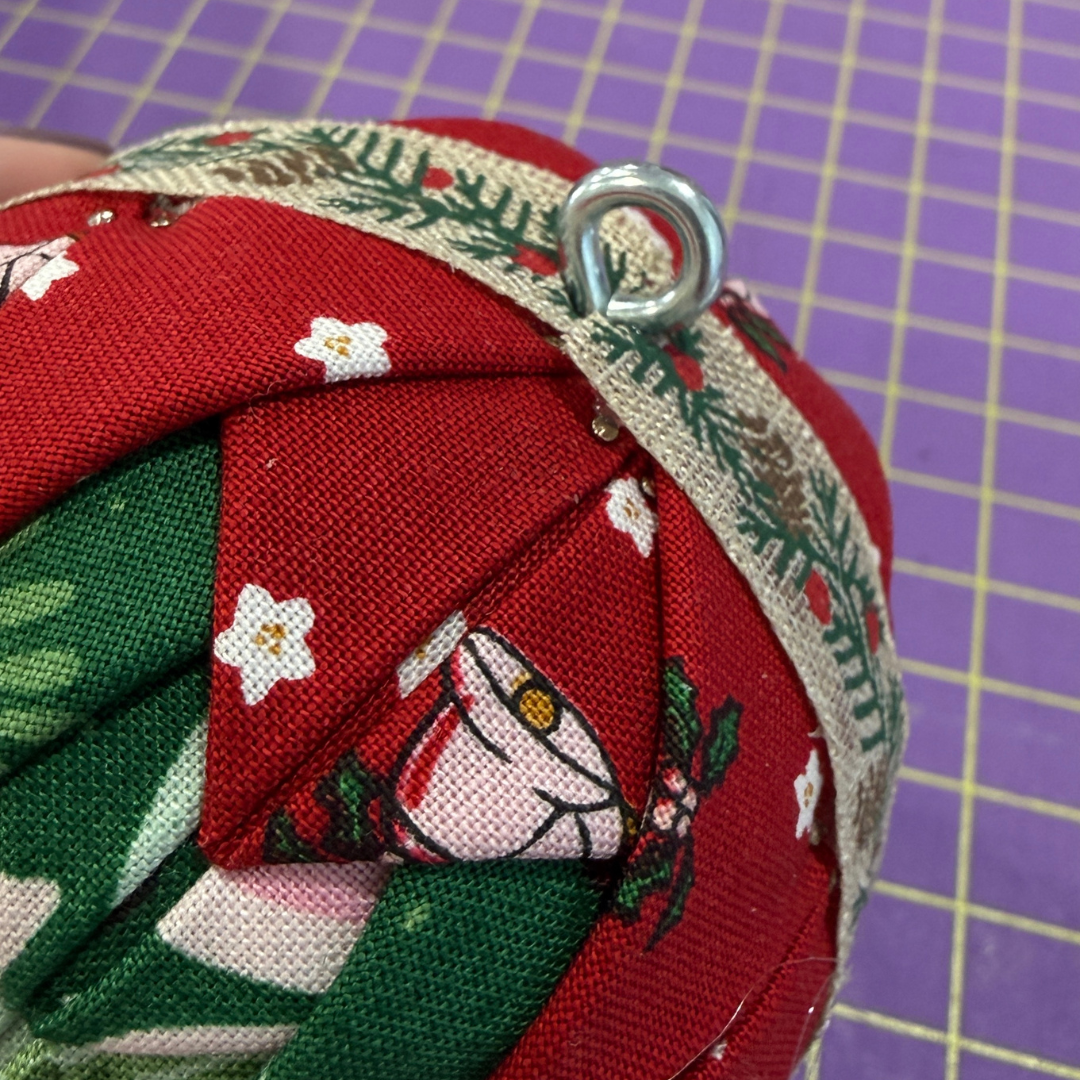
Use a small screw eye at the top of your ornament to create an attachment point for hanging. Secure it with a hot glue gun.
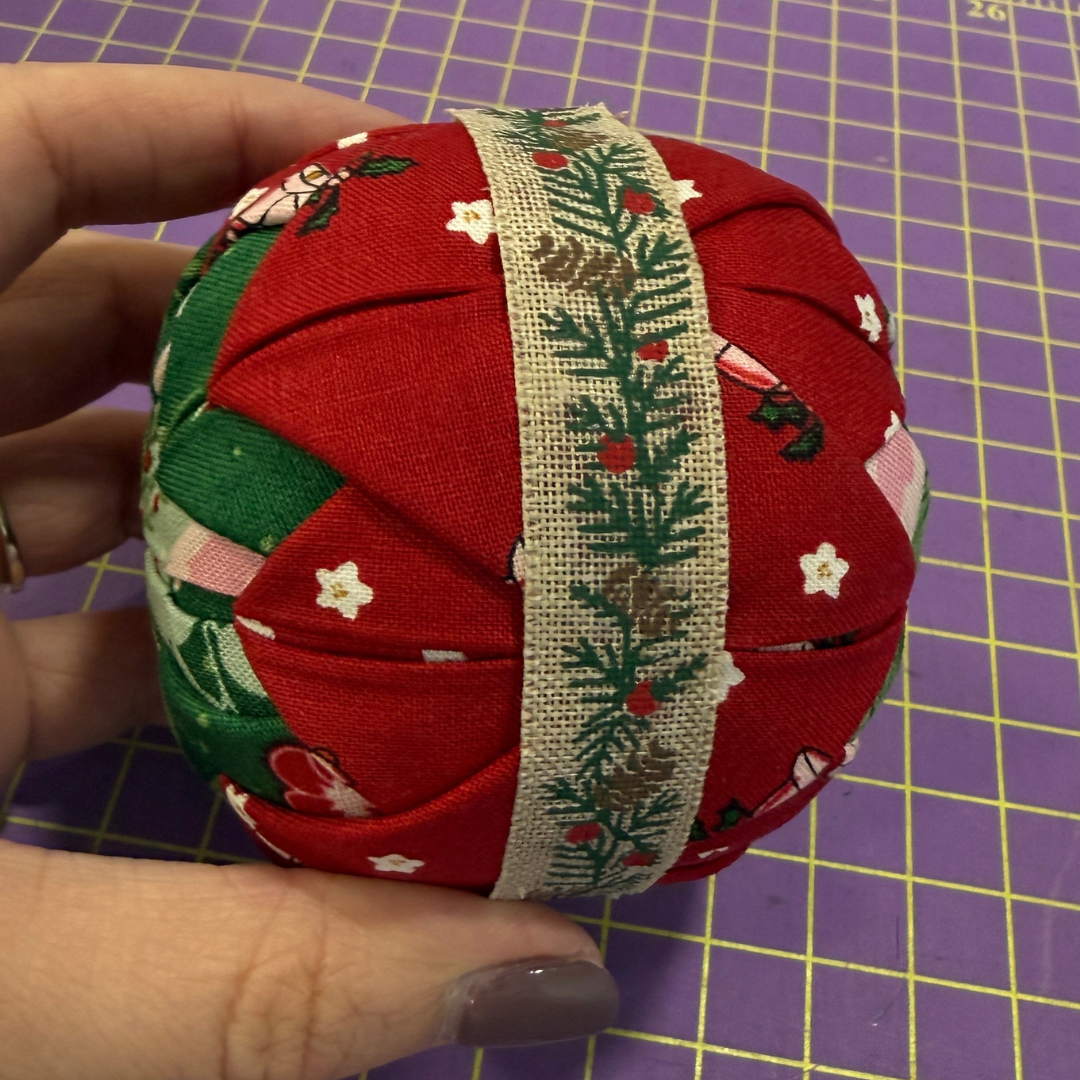
Next, add a little decorative ribbon around the middle of the ornament to cover the fabric edges and give it a polished finish. Use your hot glue gun to secure the ribbon in place.
Step 6: Add Your Hanging Loop
Attach a piece of string, ribbon, or an ornament hook to the screw eye.
And that's it! Your handmade fabric star ornament is ready for the Christmas tree!
Why I Love This Project
There are so many reasons to love these little fabric stars!
First, they're a fantastic scrap buster. If you're anything like me, you probably have a basket (or several!) of leftover quilting cotton that is just too pretty to throw away.
Second, they're a no-sew project! You can enjoy a little creative time without pulling out your sewing machine, setting up your cutting table, or committing to a big project.
And finally, they're perfect for gifting. Make a few for friends, bring one to an ornament exchange, or create a collection for your own Christmas tree.
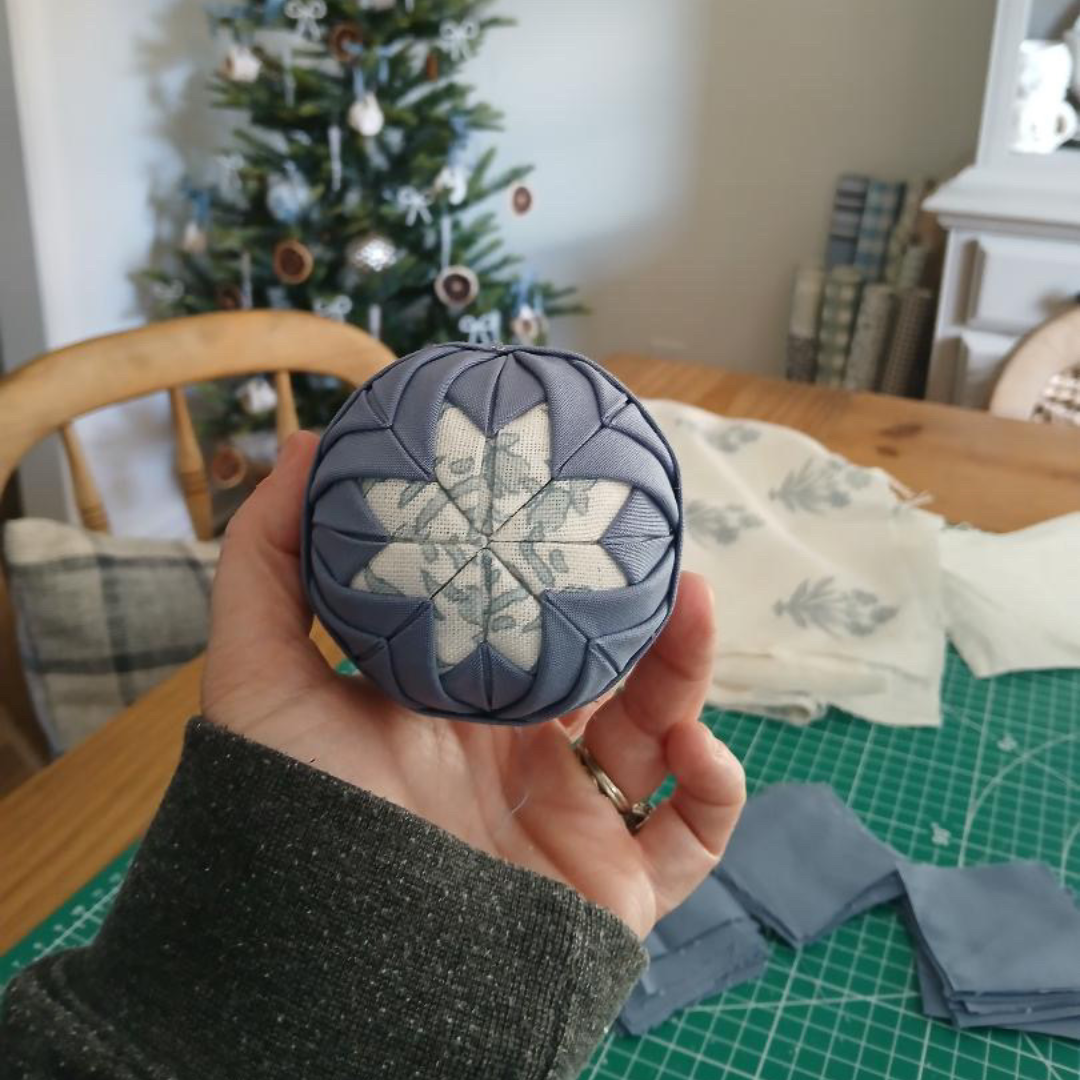
Make an Ornament for Every Quilt You Finish!
Here's a little challenge I want to share with you!
My goal is to make one fabric star ornament for every quilt I finish throughout the year, using scraps from each project.
Think about how fun it would be to have an entire Christmas tree filled with handmade ornaments that represent all of the quilts you've created! Each little star would be a colorful reminder of a project, the fabrics you chose, and the memories made along the way.
Instead of simply storing those leftover scraps away, we'll turn them into something we can enjoy year after year.
I'm already looking forward to seeing my sewing room Christmas tree fill up with these little creative memories!
Watch the Video Tutorial
Want to see how these fabric star ornaments come together? Check out my original video tutorial for a visual walkthrough of the project.
Watch the No-Sew Fabric Star Ornament Tutorial on Instagram
And if you make one, please tag me! I would LOVE to see your fabric combinations and how you put your own creative spin on these ornaments.
Happy sewing (and happy holiday crafting)!
Bethany
Craft with Bethany
